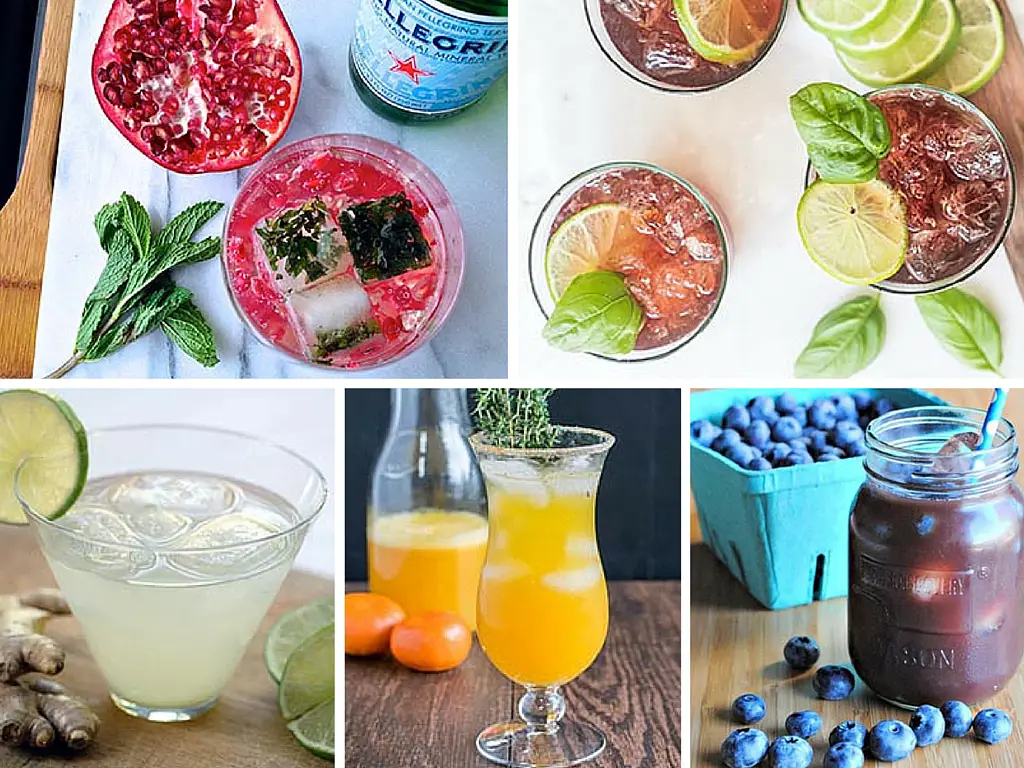
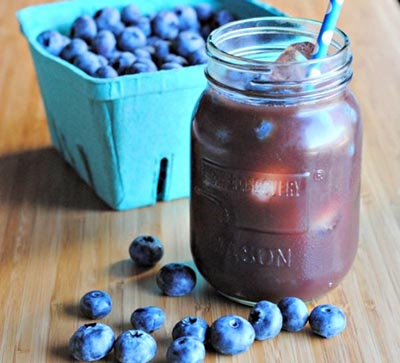
Ah, there is nothing quite like winding down with a beautifully crafted cocktail. Beyond the buzz, there is so much to enjoy in an ice-cold, colorful glass of goodness.
Unfortunately, alcohol isn’t exactly known for its healthy reputation (besides red wine), and sometimes, it’s good to cut back.
One of the major focuses in the beginning stages of The Happy Body Formula is eliminating alcohol entirely. Unsurprisingly, this is HARD for people to do.
When it comes time for the weekend, or when we get a night off, we tend to gravitate towards a drink to wind down with. While these healthy mocktails lack in the hard stuff and sugar, they are tasty and can help curb the urge by giving you something delicious and refreshing to sip on.
Black cherry basil mocktail
If the herb garden is blossoming, you’ll find that the opportunities to practice your craft cocktail skills are endless. This fizzy drink features fresh basil with an unlikely but delicious component – black cherry. A twist of lime brings this mocktail from The Wicked Spatula together.
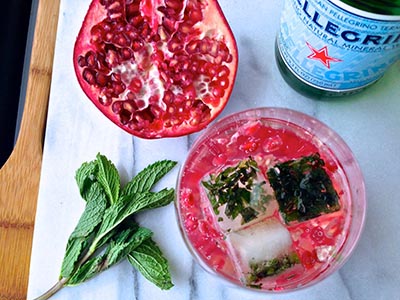
Pomegranate mint mocktails
If you’re in the mood for something beautiful and vibrant, this mocktail is dressed to impress. The pomegranate lends its slightly tart and slightly sweet flavor and color to this gorgeous glass.
Mint-infused ice cubes make this totally unique, and they won’t get watered down if you’re hanging out in the sun. Get the full recipe for these beautiful drinks from Real Food with Dana.
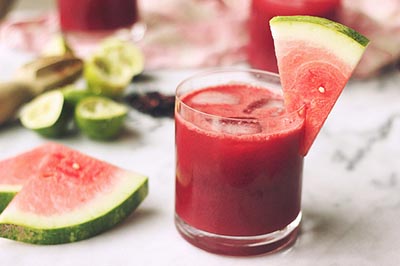
Watermelon hibiscus lime cooler
Looking for something with a little tea? This refreshing toss-up is just for you. Subtle floral flavor from the hibiscus mixed with tart lime and sweet juicy watermelon makes this the perfect healthy mocktail to cool down with.
Check out the full poolside ready recipe from Tasty Yummies.
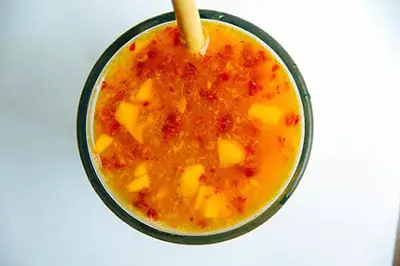
Mango raspberry kombucha mocktail
If you’ve got a fresh brew of kombucha handy, or even store bought, you’re halfway to a fancy schmancy mocktail already. In fact, you don’t have to add much more if you don’t want to.
This recipe takes it up a notch with creamy fruit purees for added sweetness and texture with natural hydration from coconut water. Get your probiotics in with this fizzy drink from Gratitude and Greens.
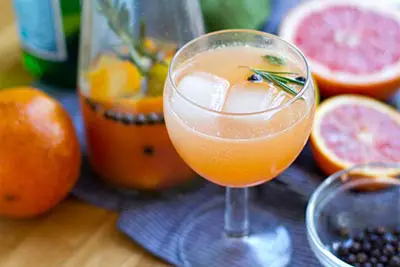
Gin & tonic inspired tipple
Gin and tonic is a classic bar staple if you’re sticking to the basics, and its distinct taste is easy to miss if you’re trying to give up alcohol. Juniper berries and lemon peel give this the taste it needs to make it feel a whole lot like the real deal.
Fresh citrus does the rest of the work. Get the deets from Eat Drink Paleo.
Ginger lime mocktail
Ginger and lime don’t only taste fantastic together, but they’re super healthy for you. This drink is crisp, cool, and anti-inflammatory with immune-boosting properties.
The only other ingredients are stevia and sparkling water, so these guys couldn’t be easier to make. Get the scoop on these refreshing spritzers from Elana’s Pantry.
Pine lime splice
Pineapple, lime and vanilla. It doesn’t get much better than this! Lime is a popular choice for a garnish on our healthy mocktail list and for good reason – it goes with everything.
Pineapple stands in for those tropical cravings while vanilla lends its complexity. Sounds fancy, but it’s quite simple. Check out how to make these on Well Nourished.
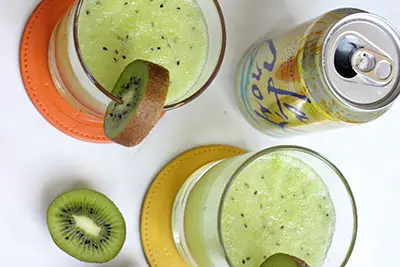
Lemon pineapple kiwi sparkling mocktail
Here we have ALL the things including the oh-so-loveable kiwi. Oh, and La Croix! This stuff goes a long way in mocktail creation, as you have a variety of flavoured bases to use.
This drink gets its sweetness from just a bit of pineapple juice with a base of sparkling lemon water and some kiwi to garnish. Get this recipe from Physical Kitchness ready for the beach.
Blackberry smash
It’s no surprise we have another lime-y mocktail! This time, this citrus pairs up with blackberries for a sweet and sour treat. This blackberry smash is exactly what it sounds like, and the recipe includes details for a blackberry syrup you can use in loads of cocktail creations.
What’s a mocktail roundup without an agua fresca? While this drink is usually made with watermelon, this recipe uses blueberries instead. Truly, you could use just about any fruit!
A little mint goes a long way in addition to a squeeze of lime in this one. Get experimental. Use a variety of berries if you’d like. Get the entire recipe from The Blenderist.
What’s your favourite way to enjoy a mocktail? Get creative! Skip the sugar and the spirits, and use mixers with natural fruits and plain sparkling water instead – you might not even miss the “bad” stuff!
Fitness can be confusing, right? Magazines, internet articles, and buzzwords make it easy for trends and myths to catch on like wildfire.
When it comes down to it, being fit is not that complicated at all. We’re here to bust down eight common myths you hear in the world of exercise.
Common Fitness Myths
You need to work out to lose weight
Lifting weights makes you bulky
You should work out ’til you pass out
The only exercise for fat loss is cardio
You can choose where you want to lose fat
You can eat whatever you want after a workout
More sweat = more burn
Longer workouts = more benefits
Pin for later
1. You need to work out to lose weight
False! Let’s clear things up. While your workout definitely benefits your waistline, it should be known that you don’t HAVE to work out to lose weight.
Exercise is beneficial to so much more than physique as it releases endorphins in your brain and can be a great stress-reliever. When it comes down to it, losing weight really happens in the kitchen.
Your gym routine will speed up the process, but a daily walk will work just fine.
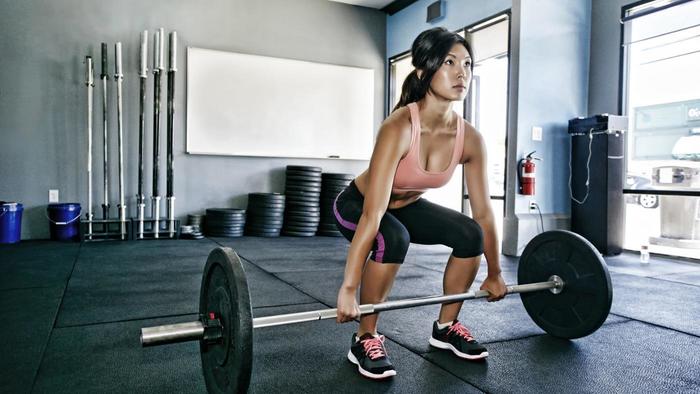
2. Lifting weights makes you bulky
Ladies, are you afraid to hit the weight room? Don’t be! Lifting weights can be fun, empowering, and help you to set strength goals and focus on numbers beyond the scale.
Forget the notion that you’re going to bulk up. The truth? It takes a LOT of effort to put on muscle. You’re not just going to pile on the gains with a casual lifting routine and a moderate diet.
Your body requires loads of extra energy and specific programming to get ‘bulky,’ so don’t worry. You’ll just progressively look more athletic and toned.
3. You should work out ’til you pass out
We’re constantly under the impression that we have to work hard. The hustle mentality is okay sometimes but it’s NOT realistic everyday.
When it comes to working out, it’s good to set goals and go after them as your body and mind allow. Oftentimes, your mind will tell you that you can’t before your body does, and pushing out that one last rep or mile is okay.
On the other hand, pushing the limits everyday is not necessary for success. Just because you’re not dead tired or super sore when it’s all said and done doesn’t mean you didn’t work hard enough.
4. The only exercise for fat loss is cardio
The best exercise for fat loss? Probably the exercise you’re most likely to stick to on a regular basis. In that case, whatever is the most fun. For some people, it isn’t cardio.
While running burns a lot of calories, high-intensity interval workouts (like kettlebell training) do the same damage in a shorter period of time while incorporating resistance training.
Lifting heavy weights will help you maintain or build muscle, which in turn increases metabolism. The absolute holy grail of exercise for fat loss is cooking and eating balanced meals, though.
5. You can choose where you want to lose fat
Just because we’re working our abs doesn’t mean we’re on our way to a six pack. Six pack abs develop when the core is developed and the body is at a low enough overall body fat percentage to show it.
This has just about nothing to do with how many sit-ups you do. The idea that we can spot target fat is wrong, and that’s okay! Focusing on full-body exercises, a good diet and building strength can eventually smooth out the rougher edges.
6. You can eat whatever you want after a workout
Technically, you can eat whatever you want whenever you want. Unfortunately, we sometimes use exercise as an excuse to have a little (or a LOT) of that “forbidden food.”
While working out can give us a metabolism boost, burn a few extra calories and make us feel like we ‘earned’ that treat, it’s a much better idea to eat for fuel and recovery, not as reward. Instead, reward yourself with a sauna session or a new book.
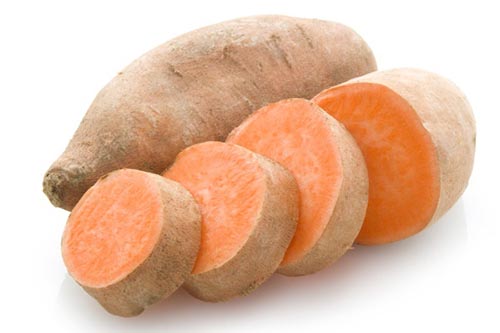
Skip the ice cream for protein that will feed your muscles and healthy starches like sweet potato to build up your energy.
7. More sweat = more burn
While this may FEEL like the truth, it’s simply not. It’s great to break a sweat, and we often feel accomplished when we do. Sweating it out can even be quite therapeutic.
Go ahead and sweat it out, we’re not saying it’s wrong. Alas, equating sweat with calories burned or a ‘job well done’ just doesn’t hold up.
Sweating is merely the body’s way of managing heat, so we sweat as much as we do sedentary sitting beneath the sun as we might during a brisk walk on a mild day.
8. You have to work out for ‘x’ amount of time to see benefits
If anyone ever tells you that you have to workout for 45 minutes, an hour, or more than that per day to see results or benefits, they’re wrong.
We’re here to tell you 5 minutes is good enough. 10 minutes is better, 20 is awesome, and 30 is ideal. The biggest exercise myth is to do something that doesn’t work for you.
Fitness is an individual journey. Whatever amount and type of exercise easily fits into your daily routine without stress is perfect.
Have you regretted falling victim to one of these myths in the past? Share this with your fit friends to spread the message!
We are ALL about DIY beauty around here. Actually, we’re all about DIY everything. From the amazing skin benefits of dry-brushing to homemade toothpaste, we’re big believers in doing things the all-natural way.
The fact of the matter is, if you can do it on your own, it’s probably better (i.e. healthier) that way. We think it’s so important, that we dedicate an entire week of The Happy Body Formula to ridding your beauty routine of toxic ingredients!
Skin scrubs, makeup and hair products are big culprits, and it’s often hard to tell exactly what’s hiding out. Moreover, it’s hard to tell if these products are helping us more than they’re hurting us.
Today, we’re getting down to nourishing your hair so that it’s soft, healthy and well-conditioned. The key is to not strip it of its natural oils, which many traditional and harsh cleansers do. From pixie cuts to long locks and natural to dyed, we’ve got the DIY treatment for you.
If you know anything about us, you know that we are big proponents of avocado oil. Of course, we’ll get to the other oils in this article too, but this one makes just as good a hair treatment as any.
Massage avocado oil into the scalp. This stimulates blood flow straight to the follicles of the hair which promotes growth.
Vitamins B & E in particular are easily absorbed through the scalp, which can help both hair growth and helps to protect the hair against environmental toxins and damage.
To use as a moisturizer, mix 1 teaspoon of avocado oil with one beaten egg and a teaspoon of olive oil. Work from the roots to the ends, let it sit for a half hour, and wash out with shampoo.
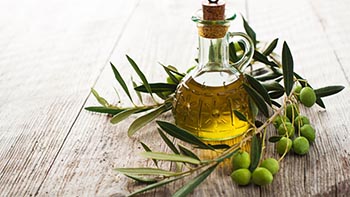
2. Olive oil
Speaking of olive oil, it makes a great natural hair treatment too! As we mentioned above, combined with avocado oil, this dynamic duo is perfect for hair growth and deep conditioning.
Dry, thick hair takes really well to olive oil. While olive oil can weigh down hair with a thinner texture, olive oil will give a dry mane the moisture it needs to look and feel healthier.
Split ends can be repaired and prevented with a bit of olive oil. Simply rub a bit onto the last two inches or so of your hair, and pin it out of the way so it doesn’t get on your clothes or skin.
To use as a hair treatment, try mixing 1/4 cup of olive oil with a ripe, mashed banana. Massage through your hair and wrap in a shower cap or a plastic bag. Rinse with warm water after 30 minutes.
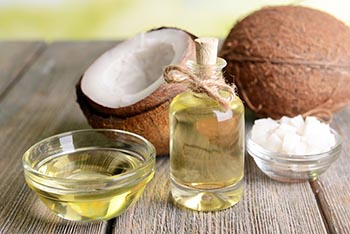
3. Coconut oil
Okay, I promise we’ll move on from oils after this one, but of coursecoconut oil was going to end up here. After all, you can use it for literally everything (don’t quote us on that). Here’s how.
Dandruff can be drastically improved with the natural moisture found in coconut oil. Coconut oil contains antiviral and antimicrobial properties which can help fight dandruff at the source while soothing the scalp.
Styling hair with coconut oil is easy. Forget toxic gels and pomades. Remember, a little goes a long way! Use it to tame frizz, hide split ends, and easily detangle knots with a comb.
Use it as a shampoo by mixing 1/3 cup with a cup of castile soap, 1/3 cup of coconut milk and some essential oils. No toxins, no sulfates, and no harsh chemicals required!
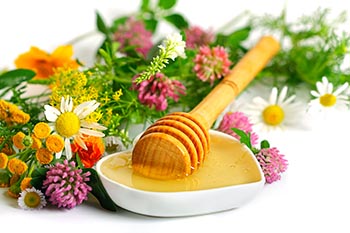
4. Honey
Honey isn’t just good for a sore throat. This sticky stuff has some serious benefits when it comes to DIY beauty from healthy, glowing skin to long and luscious locks.
The high sugar content might not be ideal for consumption (in excess), but it is ideal for hair. It can actually help the hair and the follicles retain moisture, leading to hair growth.
Psoriasis can be treated naturally with honey because of its antimicrobial properties. It helps the scalp to stay clean and free of bacteria. This can also help with dandruff.
Honey and water make up one of the easiest DIY hair treatments. Simply mix 1/4 cup of honey with water to dilute the mixture enough to spread easily into your hair. Voila! No fuss, no hassle, no excuses.
5. Apple cider vinegar
Ah, here’s another miracle food that we love to talk up. This is all for good reason! ACV has a reputation for better digestion, immunity and natural skincare, but it’s also fantastic to tame your mane with.
The pH levels found in apple cider vinegar are a perfect match for our hair. Without getting all science-y, the point is that our hair is already acidic, and most shampoos have too high of a pH level to keep those levels alkaline. ACV helps to find that happy balance.
Inflammation caused by dryness, harsh hair products, dandruff, psoriasis and sunburn can be counteracted with apple cider vinegar which is a notoriously anti-inflammatory food.
A standard rinse made from apple cider vinegar is simple to make and use. Just mix two tablespoons of ACV with 16 oz. of water and pour over wet hair after shampooing. Leave it in for 1-2 minutes before rinsing out.
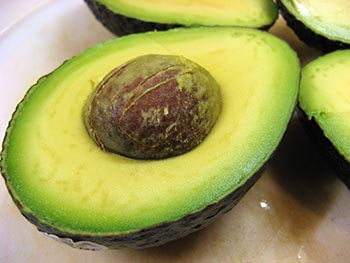
6. Avocado
If the oil is good for your hair, why wouldn’t the fruit itself be an obvious contender? With its healthy fats and creamy consistency, this stuff is made for an effective hair treatment.
Shiny, soft and bouncy hair is often compromised by colouring, heat tools and styling. Avocado can fix all that because it contains the same oils found in avocado oil (duh), which help to repair all that damage.
The natural source of vitamin E is known to promote hair growth, so getting straight to the source with some direct avo on hair action is the best way to get longer locks.
You can use it on its own or mixed with other stuff like olive oil, coconut oil or egg yolks… there are a million recipes out there! Simply mash up an avocado and spread it onto your hair. Let it sit for 15 minutes and rinse. Boom! Soft and shiny.
7. Eggs
We’ve mentioned eggs enough times on the list now for them to get their time in the spotlight. Again, this is a beloved food when it comes to nutrition, but it also has moisturizing properties perfect for the hair.
The yolks are where the magic happens, much like when it comes to breakfast. Here’s where the vitamins A, E and D reside which can all contribute to healthier, longer hair.
Vitamin B12 which is difficult to get outside of animal products not only boosts hair growth, but it can give you a thicker and more voluminous mane.
To repair damage, whip up this recipe: 1/2 cup of honey, 1-2 tablespoons of egg yolk and olive oil. Leave it in for 15 minutes and wash out.
8. Yoghurt
DIY hair care is beginning to sound a lot like breakfast, but it drives the point home that we often have these ingredients lying around the house, ready for creative use. Yoghurt is no exception.
Protein might be the key to why yoghurt is great food for the hair. After all, the hair (and nails and skin) rely on protein to build and grow. That’s why yoghurt is great if you’re looking for a little extra length.
Biotin, a popular supplement taken for skin and hair growth, can be found in yoghurt and applied directly to the scalp making it the ultimate treatment for long locks.
To use a brightening mask for shinier, healthier looking hair, simply mix up 3 tablespoons of lemon juice, a tablespoon of olive oil, warm yoghurt and a whisked egg yolk. You’ll get LOTS of benefits from this recipe!
9. Lemon juice
Piggybacking on our last recipe, let’s talk about using lemon juice on your hair. While you might think its acidity means drier hair, you might be wrong. It has plenty of uses.
If you want to go lighter, you can skip the bleach. Bleach is harsh and does loads of damage to the hair. A little lemon juice combined with some time spent soaking up the sun can give you natural highlights without taking the brunt.
Treat an oily scalp with lemon juice as it has the ability to soak up oil like a sponge. Just soak your hair in lemon juice or apply it directly to the scalp and rinse out.
Avoid the heat because lemon juice can help you get straight hair without the aid of a flat iron. Mix 1/4 cup of lemon juice with a cup of coconut oil (melted) then refrigerate. Apply the paste, wait 15 minutes, rinse with cold water, and comb straight for sleek hair all day.
10. Champagne
Let’s go out with a bang, or rather, a pop. It’s time to celebrate, and what better way to do so in style? Of course, this might not be the most cost-effective option, but hey… who said we couldn’t get a little fancy?
Enhance your highlights with a little bubbly. Use fresh champagne for a quick rinse to bring out the natural golden hues in your hair without any unnatural chemicals, dyes or shampoos.
Give yourself a root boost by spritzing a bit of champagne onto the scalp before you blow-dry.
To use as a rinse, comb fresh (i.e. bubbly) champagne through the hair and let it sit for 15 minutes. Wash out and blow dry. The high antioxidant content will leave you with a sparkly, shiny ‘do.
Do you do DIY hair products at home? What is your favorite recipe or combination that you always have on hand? Share with us below!
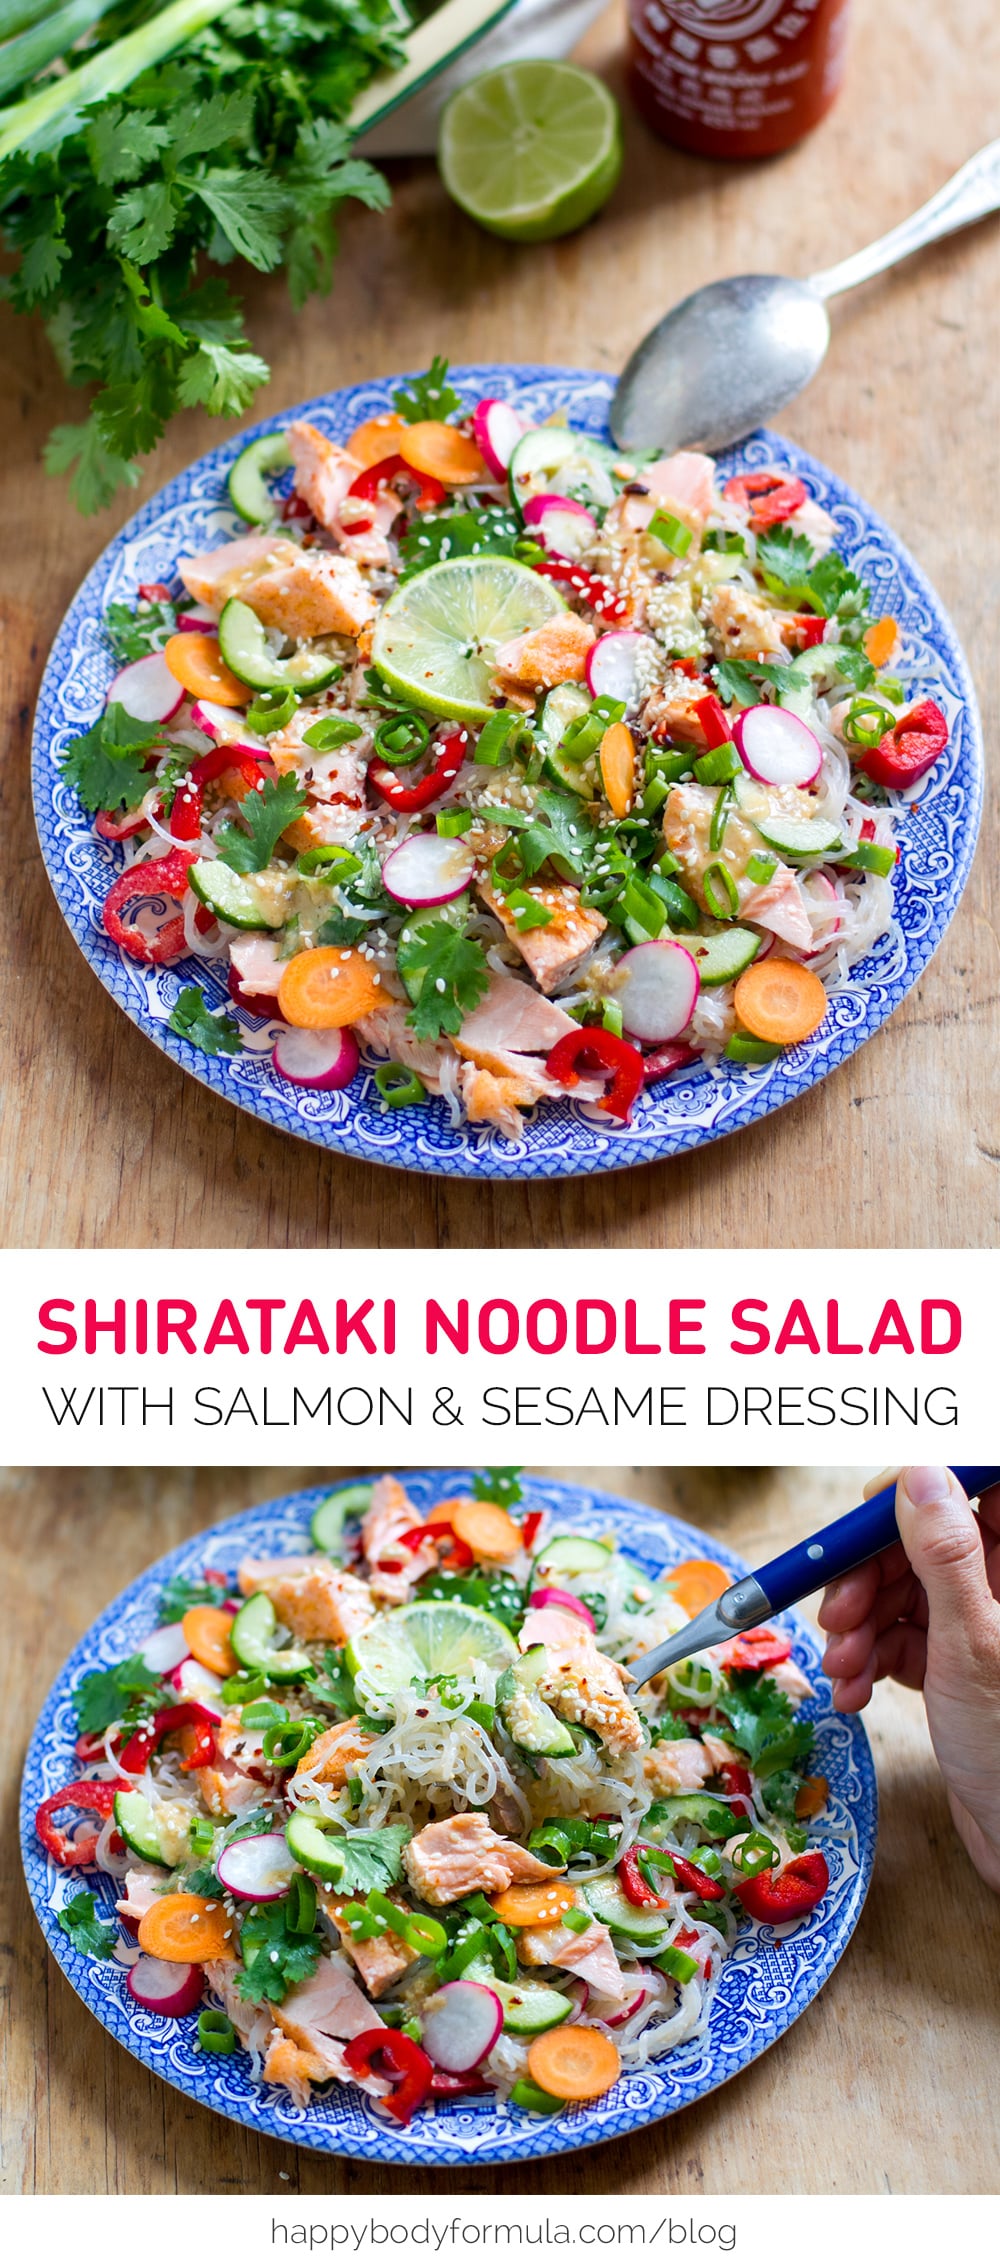
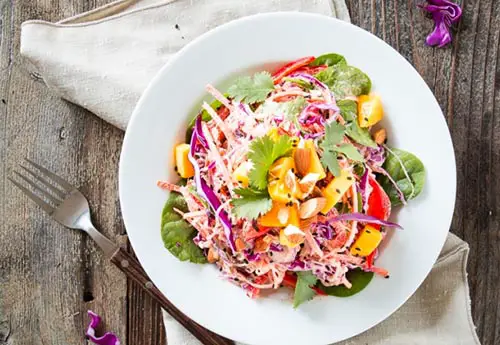
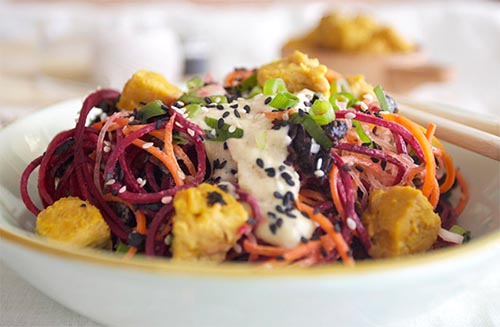
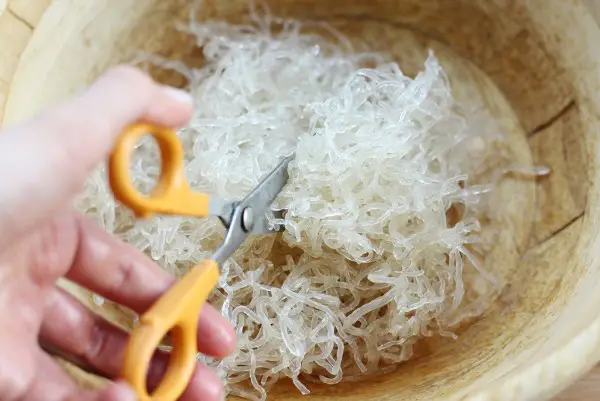
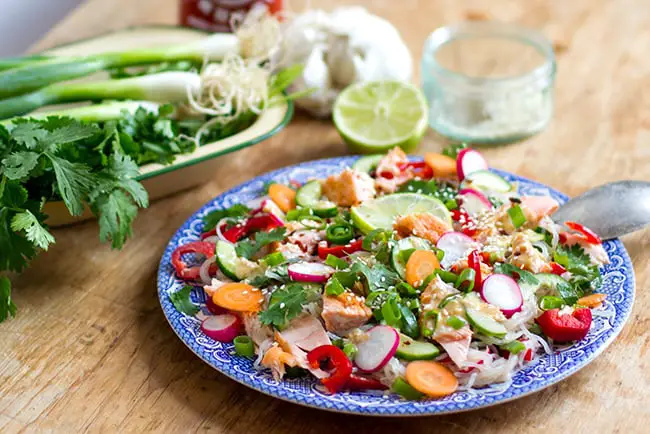
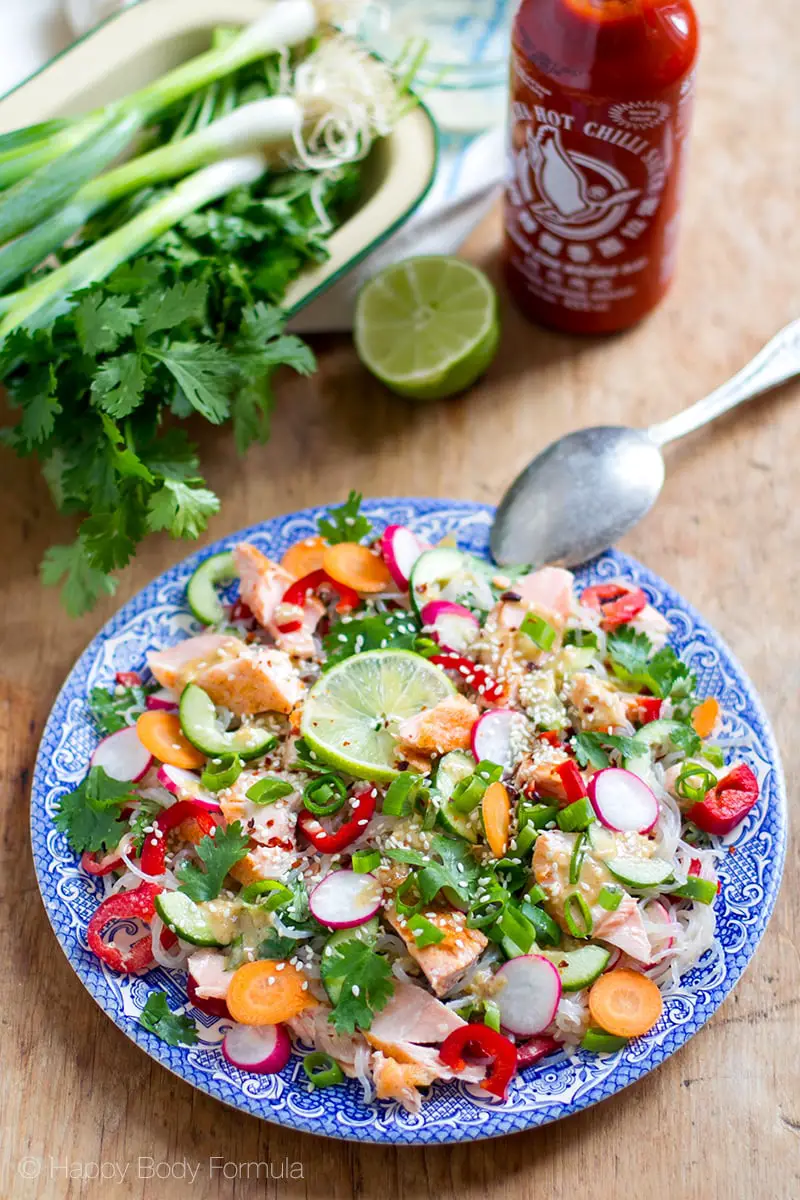
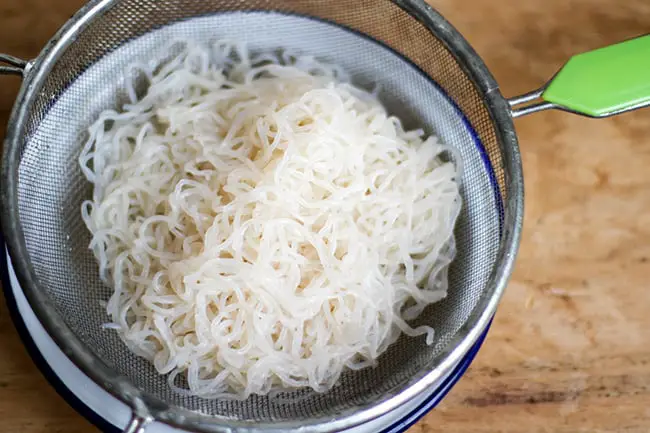
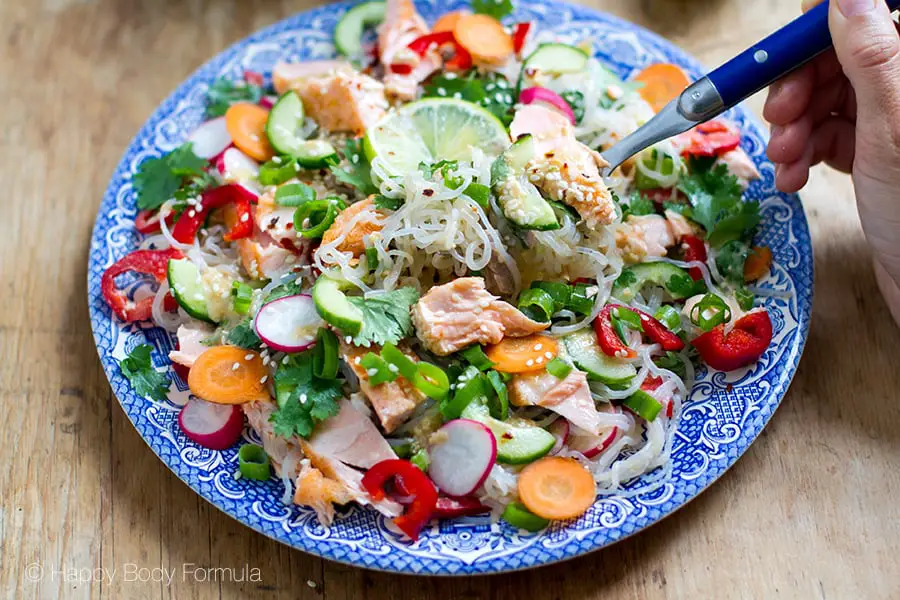
This filling and nourishing salad is made with shirataki noodles, also known as konjac noodles. It’s low in carbohydrates, high in fibre and full of beneficial Omega-3s and antioxidants.
What are shirataki or konjac noodles?
Konjac or shirataki noodles are made from a root vegetable called Konjac. Konjac (yam) has been a popular Asian staple food for hundreds of years.
The noodles made from this root vegetable are low in calories (only 8-10 calories per 100 grams of cooked noodles), almost entirely carbohydrate and fat free, and gluten free. They are also a great source of soluble fibre called glucomannan (5 grams of fibre per 100 grams of cooked noodles).
Shirataki noodles usually come pre-cooked and packed in water, so they only need to be rinsed and sometimes soaked quickly in hot water. They’re great for bulking up salads and stir-fries, or to use in spring and sushi rolls.
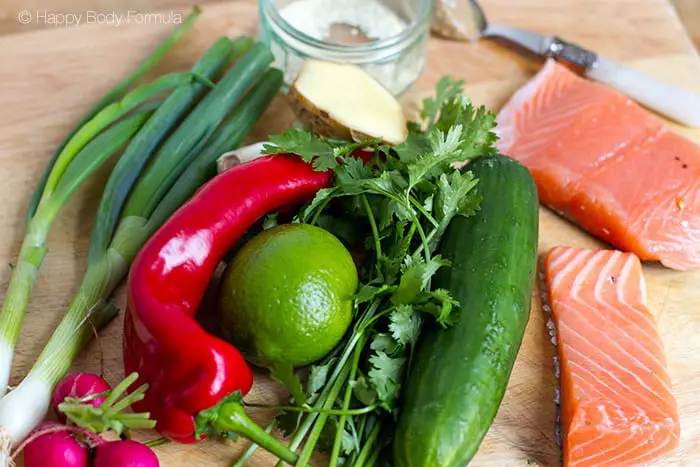
For this recipe, I am using angel hair konjac noodles, which I rinsed well in cold water and then strained of any excess liquid. You can add any salad vegetables you like and replace salmon with grilled chicken, prawns, mushrooms or tempeh for a vegetarian version.
4.7 from 11 reviews
Shirataki Noodle Salad with Salmon & Sesame Lime Dressing
1 teaspoon finely grated garlic (about 1 small garlic clove)
1 teaspoon finely grated ginger, or 1 teaspoon ginger powder
1 teaspoon tahini (sesame paste)
1 teaspoon sesame oil
1 teaspoon honey
zest of medium lime juice of 1 medium lime
1 tablespoon fish sauce
2 tablespoons olive oil
1 teaspoon Sriracha hot chilli sauce, or other chili sauce or some dried chili flakes
Generous pinch of sea salt
Instructions
Rinse and strain the konjac noodles and set aside.
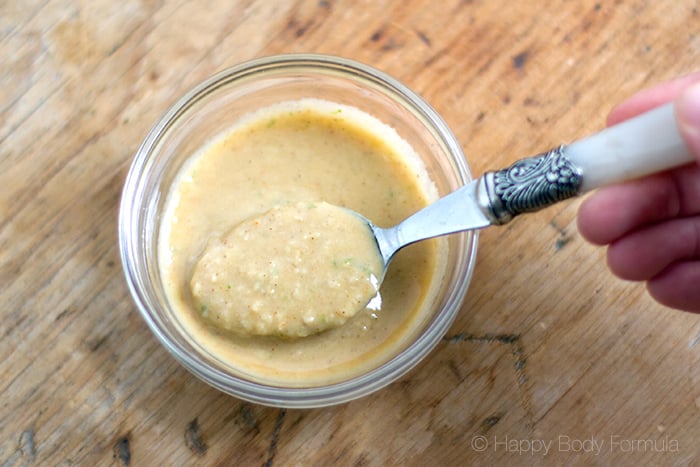
Combine the dressing ingredients in a bowl and whisk with a fork. Set aside.
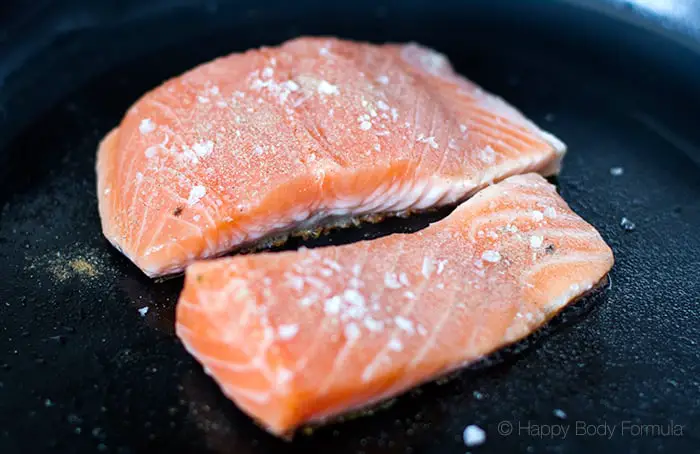
Heat coconut oil in a frying pan or a skillet. Wash and pat dry the salmon with the kitchen roll paper. Place in a hot pan, skin side down. Sprinkle the flesh side with white pepper and sea salt. Cook on the skin side over medium-high heat for 3 minutes, then turn over and cook for a further 2-3 minutes. Remove to a plate to rest.
Prepare the vegetables and herbs and combine them with the konjac noodles in a large salad bowl. Pour over the dressing and mix through really well. I use my hands to separate the noodles and make sure they are evenly coated. Serve in bowls topped with flaked cooked salmon and sesame seeds. I like to serve an extra lime wedge and some chilli sauce on the side.
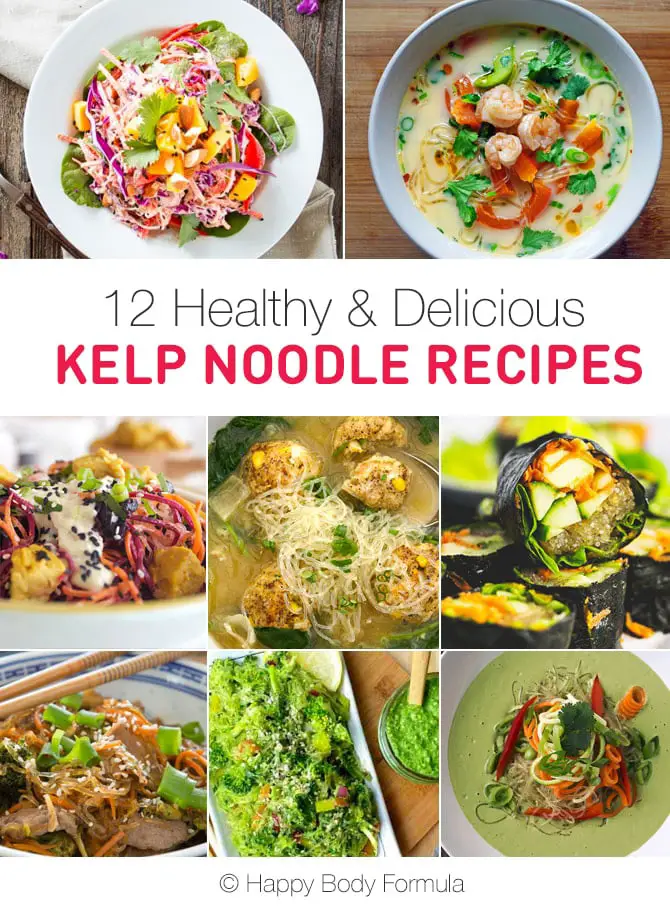
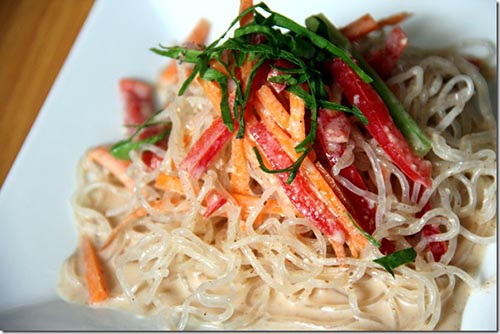
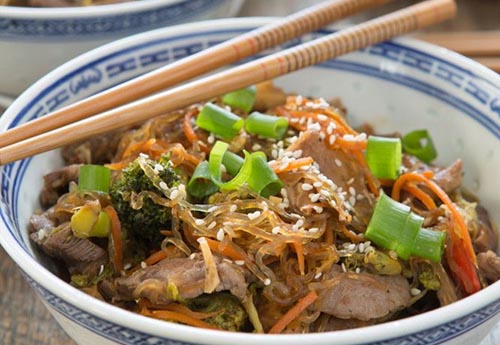
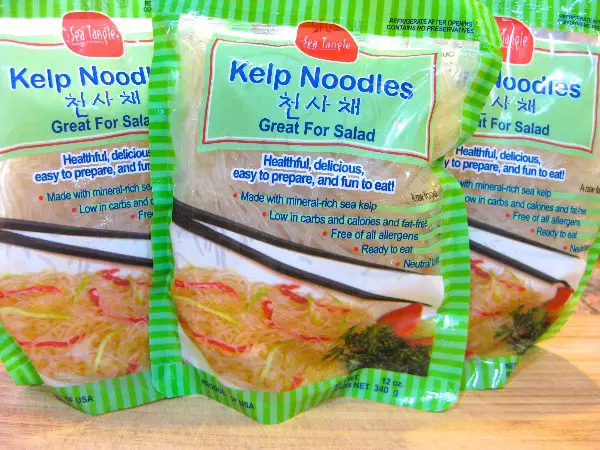
Kelp noodles are a great alternative to regular noodles or pasta as they are gluten-free, egg-free, low in calories, contain virtually no carbohydrates, and are high in iodine which helps with healthy thyroid function for healthy hormones.
The noodles are made from kelp, which is a type of large, brown seaweed, although they don’t actually resemble or taste like seaweed at all. They are crunchy glass noodles with neutral, bland taste that can take on other flavours really well.
Another cool thing about these noodles is that they require no cooking – simply soak them in water, rinse and toss through with a zesty dressing or drop in a hot, tasty broth.
Kelp noodles are popular with raw, vegan, and paleo foodies… and we love cooking with kelp too! That’s why we wanted to curate some of the yummiest looking recipes using sea kelp noodles in this post.
You can easily use them to meal prep for the week, and they’re compliant with our 30-day program – score!
This similar but slightly simpler recipe for a salad is by Aylin Erman from the Glow Kitchen (she also contributes to The Greatist website). We love the simplicity and zesty flavours in this recipe. Bonus – no cooking required! Raw, vegan, paleo and gluten-free.
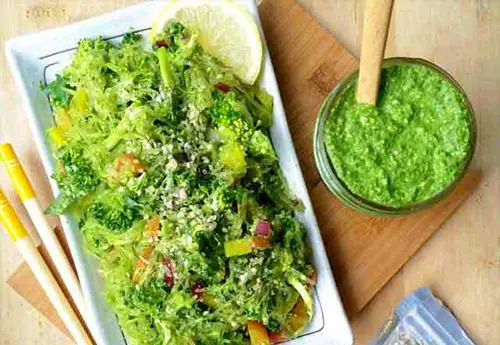
We love how fresh and flavourful this recipe looks. With the addition of kale and broccoli, this is a great way to get your daily greens, plus the pesto is a great condiment that you can use in other dishes. Raw, vegan, gluten free and paleo-friendly.
This tasty looking salad is full of rainbow colours and crunchy textures, which we love. And although we’re not fans of many processed soy products, tempeh is ok in our books in moderation because it falls in the ‘fermented soy’ category and thus contains fewer anti-nutrients.
Quick, easy and filling dinner anyone? This recipe is low-carb, high in protein, and full of veggies for a solid micronutrient fix. This dish hits ALL the notes!
Once again, this recipe requires no actual cooking so it’s simple and fast. We love the addition of almond butter in the sauce for those extra healthy fats and the zesty Thai flavors.
Peanuts can be replaced with crushed almonds or cashews and you could easily add chicken or shrimp to this dish. Raw, vegan, gluten-free and paleo-friendly.
For something a little warm and hearty, we love this ramen soup recipe. Pork can be substituted with other meat or seafood, or mushrooms and tempeh for the vegetarians.
Gerlinde of Cooking Weekends used kelp noodles in this lovely coconut based soup with great success.
She says they retained their crunchy texture and didn’t get mushy which is ideal considering the texture and taste of kelp noodles can throw some people off. In a broth this delicious, you shouldn’t even notice it!
Here is another curry soup inspired dish that we like the look of. It’s gluten-free and vegan-friendly, and it’s a great dish to store in the fridge if you’re following a make ahead meal plan.
A lot of kelp noodles recipes seem to be centered around Asian flavors and that’s why we love this idea for a soup that is inspired by Italian-American kitchen.
This ‘wedding’ soup with turkey meatballs is a great example of how you can incorporate these kelp noodles in classic soup dishes.
Classic beef and broccoli just got easy, and we’re not talking takeout. This recipe uses quick-to-make ingredients like ground beef instead of sliced beef in a bed of veggie-infused kelp noodles.
If you love Vietnamese spring rolls with shrimp, then you will love these. Kelp noodles are a fabulous addition to Happy Body Formula’s spring roll recipe which you can find in our 30-day program meal plan.
Still have questions about kelp?
Let’s learn a bit more about this grain-free noodle replacement! Hopefully, we can answer all your burning questions in this brief Q&A!
Q:Are kelp noodles raw?
A: Yes! In their natural state, kelp noodles are raw. Some recipes might call for cooking them though, to increase flavour or flavour absorbency rate of other ingredients used in the dish. At the end of the day, it’s a matter of personal taste preference.
Q: Are kelp noodles refrigerated?
A: Nope! They’re shelf-stable for around six months while retaining all their freshness (and nutrients), and that’s just about all you need to know about how to store kelp noodles. Keep them in a cool, dry place to maximise freshness.
Q: Are kelp noodles processed?
A: They should not be. They are raw and not denatured in their natural form. When seeking out a good product, search for a noodle with simple ingredients – namely, kelp! Additional ingredients like water or sodium alginate – a salt derived from the seaweed – are fine. The sodium alginate actually helps remove heavy metals from the body.
Q: Are kelp noodles low-carb?
A: Yes. They’re very low-calorie with only 6 calories per 4 ounces! This means there’s not a lot of room for carbs to sneak in. While they contain around 1 gram per 4 ounces, this is a “net carb,” basically meaning it doesn’t count because it’s actually fibre. They are a great keto-friendly noodle alternative.
Q: What do kelp noodles taste like?
A: These crunchy noodles are mostly neutral with a bland taste that can take on other flavours really well. You don’t want to eat them on their own! If you don’t like seaweed, don’t worry – they don’t have a fishy taste.
Q: Are kelp noodles a vegetable?
A: Technically, yes – they’re a sea vegetable!
Q: Are kelp noodles paleo, gluten-free, vegan, Whole30, keto and AIP?
A: YES! A resounding yes. Kelp noodles are basically compliant with any real food approach you take to food. They’re allergen-friendly and nightshade-free, so they’re good for the autoimmune protocol. Whether you’re a plant-based eater or simply avoiding grains, kelp noodles are a wonderfully convenient and versatile pantry staple.
Where to buy kelp noodles
If you don’t have any luck sourcing kelp noodles locally, you can always purchase them online. We recommend Sea Tangle kelp noodles which you can easily stock up on with Amazon. This brand contains just three ingredients – kelp, water and sodium alginate.
Where are kelp noodles sold?
If you’re in a large metropolitan area or a town with a specialty store, Asian food market, or health food store like Whole Foods, you should be in luck! Ask your retailer if they stock them in case you can’t find them.
You can often find them in the Asian food section. It’s worth taking a look at your regular grocer or co-op if they have a large selection as kelp noodles are gaining traction even beyond clean eaters.
Have you tried kelp noodles? What’s you favorite way to prepare them? Tell us in the comments below. And of course, don’t forget to share with friends and followers.
We are big believers in tending to your skin properly. It deserves a whole lot of TLC, and we’re not just talking about your face. After all, the skin is the body’s largest organ, so it’s pretty imperative that we nourish it wisely, from what we put on it to the foods we eat.
We all strive for optimal skin health yet we often focus on our face alone. The same goes for products available to us – there is a large variety of purposeful products for our facial skin care, yet our bodies are limited to all-over moisturizers and not so natural exfoliators.
Today we want to share one of our favorite and simplest ways to care for the skin on your body.
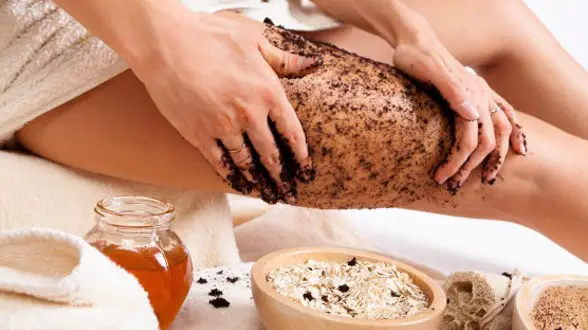
Dry brushing – which is just what it sounds like – is a gentle way of cleaning out your pores from head to toe. The benefits of dry body brushing extend beyond your skin’s look and feel. Plus, it’s easy and affordable to get started with.
Benefits of dry brushing
Beyond just physical differences in the skin, the benefits of dry skin brushing can be noticed almost immediately. We often feel much better mentally when we have a consistent beauty routine in place, so consider adding dry brushing to your pre-shower ritual.
Pampering yourself and practicing proper self-care can reduce stress, boost confidence and lift your mood right off the bat. Over time, you’ll begin to see some more of the benefits.
One of the immediate benefits of dry brushing is skin exfoliation. Just one brush will loosen and remove dead skin cells, keeping your skin nice and soft over time.
This is a great natural alternative to harsh ‘exfoliation beads’ found in commercial products which are often made of plastic. And it’s less messy!
2. Dry brushing for cellulite
While the studies on this are relatively inconclusive, experience says it all. Many passionate dry brushing enthusiasts claim to have seen improvements in the appearance of cellulite.
It can help to soften fat deposits (what cellulite is made of) and distribute them more evenly while removing toxins from the body, both decreasing visibility of cellulite.
3. Increased circulation
Many people suffer from poor circulation to some extent, especially if we’re cooped up in an office or spend much of our days sitting. Dry brushing can help your skin breathe and increase blood flow, therefore improving circulation and efficiently eliminating metabolic waste.
4. Improved digestion
We talk a LOT about how we can improve gut health, digestion and inflammation because they are such common issues. Fortunately, there are many solutions beyond diet and dry brushing is one of them.
Massaging the lymph nodes (found all over the body) helps the body shed both water and toxins.
5. Clean pores
We pay plenty of attention to the pores on our face, often scrutinizing the size of them and trying to make them all but invisible. This is just a small piece of the puzzle as we have pores all over our body!
Dry brushing is a gentle and effective way of keeping clean by removing dirt, oil and residue beyond just our daily shower.
6. Dry brushing stretch marks away
Many women have stretch marks, and like cellulite, it’s nothing to be ashamed of! We have delicate skin, and it’s sensitive to change in our bodies. Dry brushing can help turn dark, visible stretch marks into less noticeable marks with a white shade.
Moreover, dry brushing helps absorption of lotion, so using cocoa butter and the like on stretch marks will be more effective.
7. Natural energy
Between improved circulation, the invigorating sensation of dry brushing and how good it feels, and the meditative properties of this habit, you can expect a little boost of energy.
Try dry-brushing in the afternoon when you need a pick-me-up.
8. Best natural detox
If your body is working and breathing, you’re constantly detoxing. This is good! The skin is the organ most exposed to the elements which means it takes in the most toxins.
Dry brushing helps skin protect itself and ward off what is less desirable. No juice cleanse necessary!
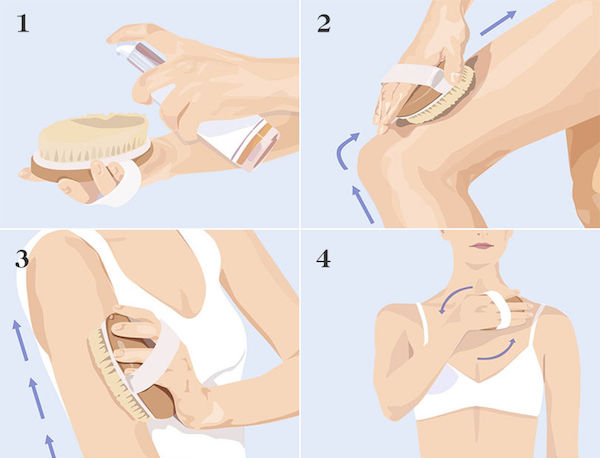
How to: dry brushing skin
Photo courtesy of goop.com
Purchase a high quality body brush for dry brushing like this one or this one. Even a great dry brush will hardly run you up a bill, and the investment is worth it regardless.
Start from the ground up. Move from your toes up to your head, but don’t dry brush your face as the skin is too sensitive.
Brush in long, smooth strokes. Brush each section of skin approximately ten times, covering a fairly wide area at a time rather than focusing on a tiny spot.
Brush toward the heart. This encourages proper circulation and drainage of the lymph nodes.
Brush firmly. You should be able to feel it, but it shouldn’t be abrasive or hurt you. Find a balance so it’s effective without injury.
Overall, the dry brushing experience is what you make it. It can last anywhere from 2-20 minutes. The best advice? Enjoy yourself.
Use this as a sacred, mindful moment in your day to focus on the sensations, stress relief, and necessary self-care. Over time, you will reap the benefits!
Are you familiar with dry brushing? If you have any of your own tips, share them below. Otherwise, share this with your friends who are new to dry brushing!
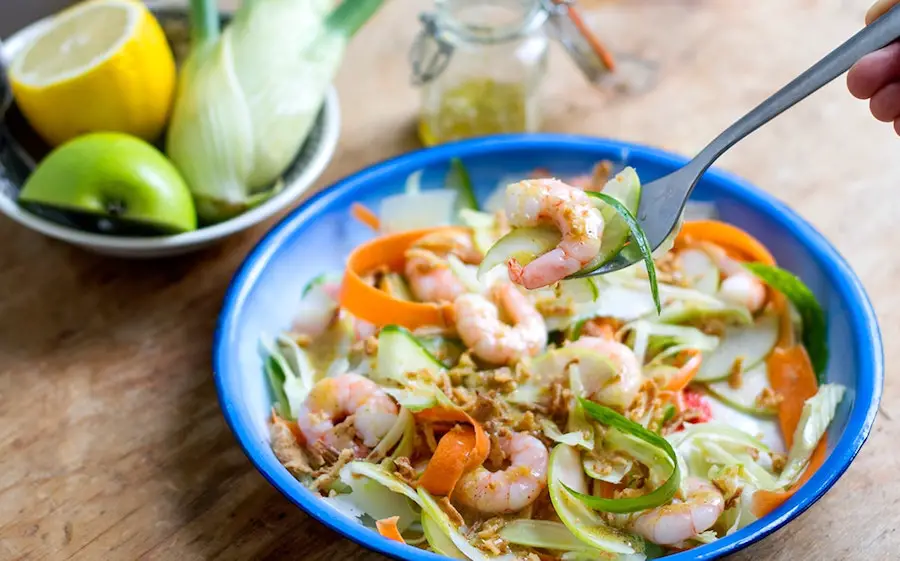
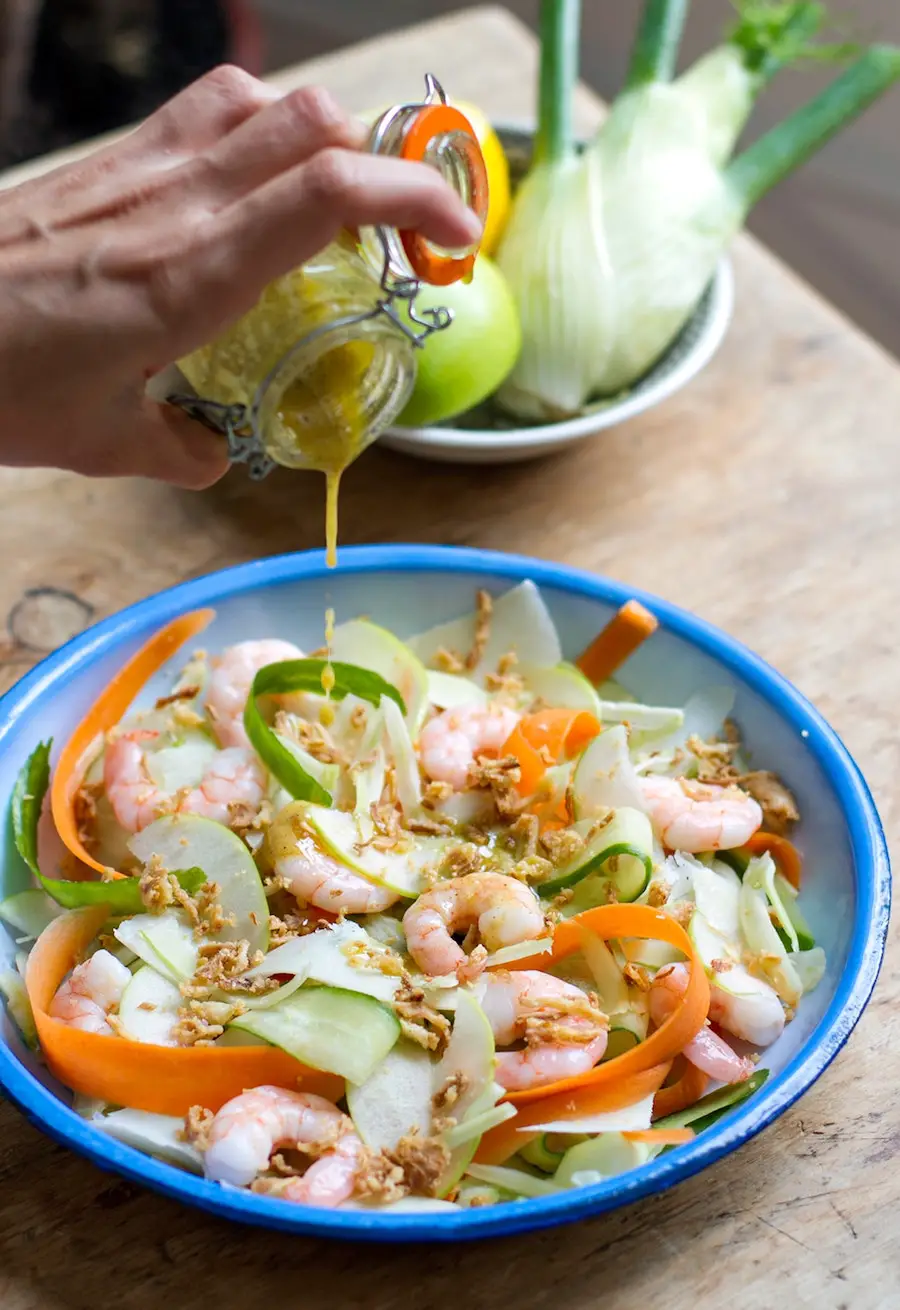
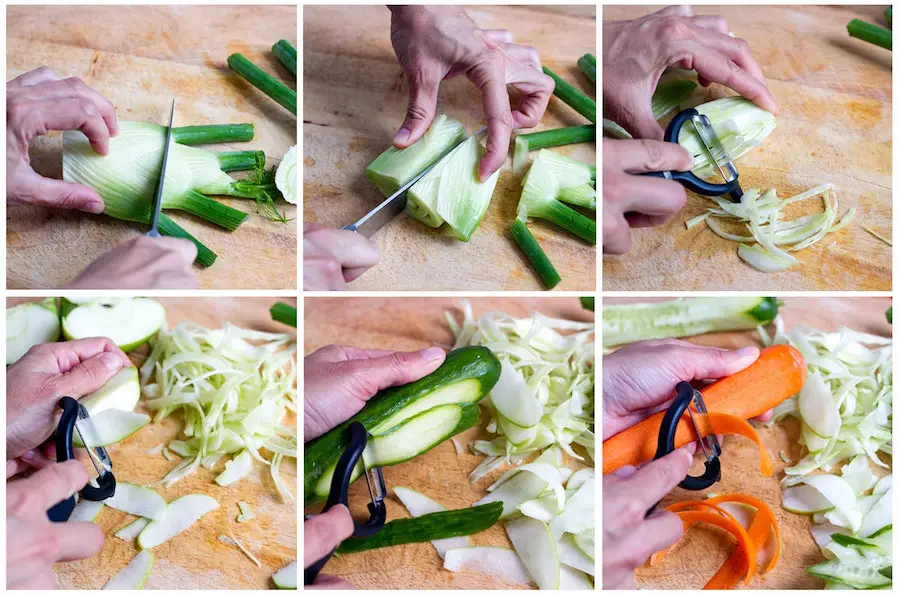
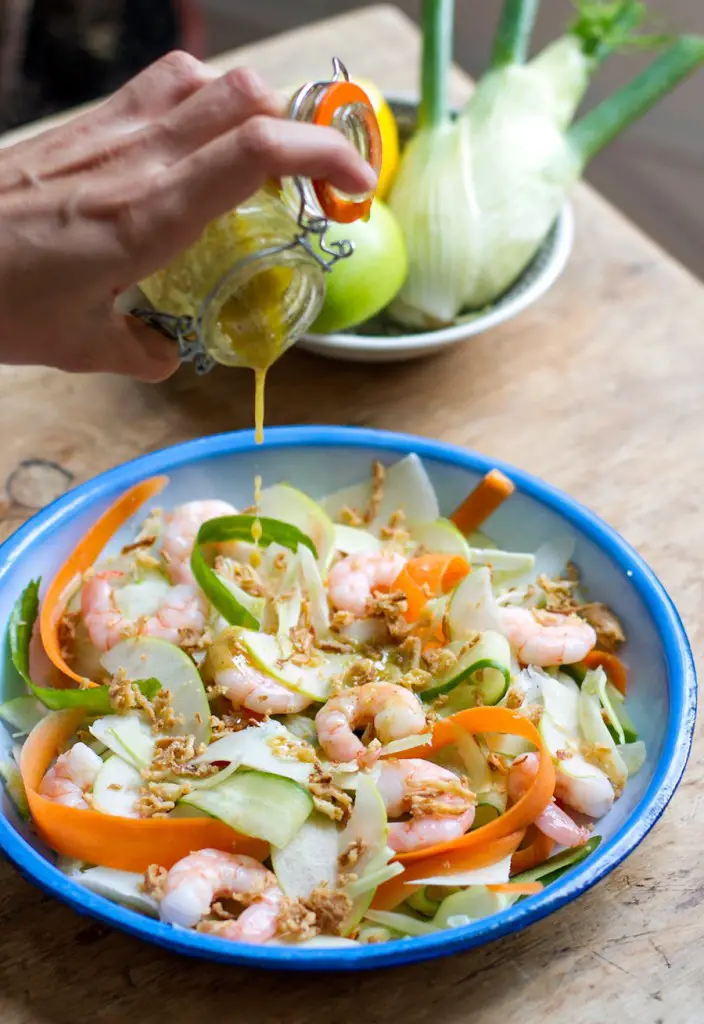
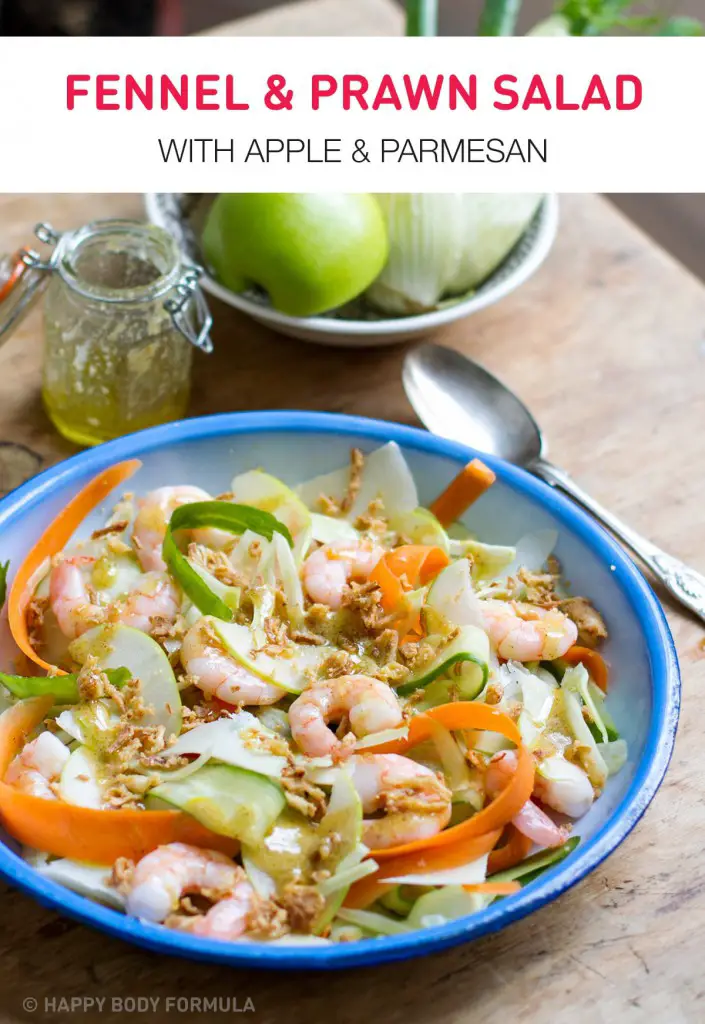
Fennel is fantastic in salads, especially when paired up with sweet apple and sharp cheese like Parmesan. I opted for some prawns as my protein choice but grilled chicken or fish would work well too.
It’s light yet satiating and very nourishing. The best part is it only takes 15 minutes to make.
What’s good about it: This salad contains lots of powerful anti-aging and immune supporting nutrients, which we talk about a lot in our Happy Body Formula program. It’s a perfect meal to include in your weekly meal plan.
It’s high in B group vitamins and vitamin C, comes with lots of fibre, which helps with weight loss and is important for a healthy heart. Prawns are an excellent protein choice with high amounts of magnesium, which plays a role in bone development and nerve and muscle function (plus it helps you sleep better); zinc, which supports immune function; and selenium, one of our favorite antioxidants.
Parmesan is a good source of beneficial probiotics and vitamin K2, which is important to your heart, brain and bones.
1 medium green apple, quartered, seeds out and thinly sliced
½ cup shaved Parmesan cheese
¼ cup crispy fried shallots (found in Asian grocers), optional
Instructions
tablespoons lemon juice
½ teaspoon Dijon mustard
tablespoons olive oil
teaspoon honey or brown rice syrup
generous pinch sea salt
3.5.3208
Want more recipes like this?
Is life getting in the way of your goals to eat healthier and feel better?
We know it’s hard to stay on track when you’re tired and busy during the week. We often make bad choices when unplanned and unprepared.
That’s why we created our make ahead meal plans, complete with real food recipes and shopping lists that will cover you for five dinners, lunches and breakfasts.
We believe that planning and preparing meals ahead of time is your best strategy towards healthier eating. Get the 7 Day Meal Plan Today.
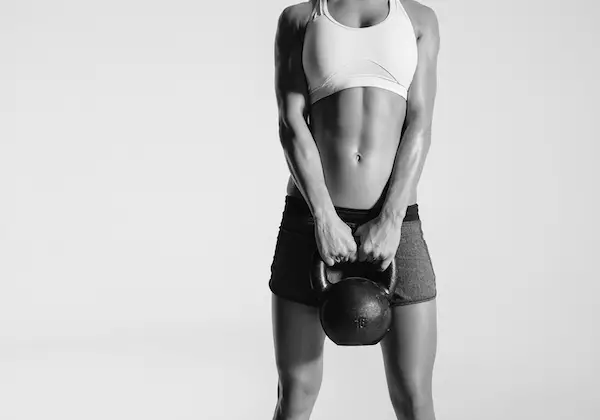
So, you want to play with kettlebells? Well, you’ve come to the right place. Let’s assume you don’t know anything about kettlebells. In my experience, that’s most people’s reaction.
First, they ask “What’s a kettlebell?”
It’s a rock with a handle, making rocks much easier for humans to lift. Okay, that’s not the real definition, but close enough. These weights are comparable to dumbbells as most lifts use just one hand, you can double up, and they come in all different sizes making them accessible to people of any athletic ability.
Photo courtesy of Onnit.com
Where to buy kettlebells
You might already have something lying around, but many kettlebells found in stores are very lightweight. While this isn’t a bad thing, it’s best to invest in one or two kettlebells; a challenging but manageable weight that translates well into any one-handed exercise, and a slightly heavier one for two-handed exercises (or for when you get stronger!)
A beginner should opt for a 12 or 14 kilogram (25-30 lbs) kettlebell. If you’re accustomed to lifting heavy weights, you can likely opt for a 16 kilogram (35 lbs.) kettlebell – a versatile option for men and women.
For a heavier weighted kettlebell, try a 24 kilogram (53 lbs.) weight. This will come in handy for full-body, two-handed exercises. Some of the most reputable brands of kettlebells come from Rogue Fitness, and they offer bells in all sizes.
If you’re on a tight budget or hesitant to make an investment as a kettlebell beginner, try an adjustable kettlebell.
Photo courtesy of Fitnistics.com
The most unique aspect of working out with kettlebells is the conditioning. Besides strength and muscle development, you can break a serious sweat with the endurance exercises and cardio that are built into kettlebell circuits.
Finally, there are so many exercises to build upon and they are almost ALL considered full-body lifts. Some people like to work specific parts of the body, but for those of us hoping to increase overall strength, stamina and fat loss, the kettlebell is your best friend.
These are the five exercises you should start out with. Disclaimer: Some of these lifts (i.e. the Turkish get-up and the kettlebell snatch) are technical lifts which rely heavily on form and technique to avoid injury. Please consider proper training with someone who is RKC certified before attempting these at home.
Heavy kettlebell swings
Swings are the obvious choice when it comes to working out with kettlebells. They encompass all the important aspects of a full-body movement while burning some serious calories in a short span of time.
They increase both strength and endurance. While you can opt for lightweight one-handed swings or double-handed swings, alternating between arms is like killing two birds with one stone.
Choose a challenging weight that you can bring to chest-height for at least 10 reps in a row. You may be wondering, “How is this a full-body workout?”
While envisioning the movement in your head might lead you to believe that it’s all in the upper body, it doesn’t have much to do with your arms.
The kettlebell swing is an explosive movement. The drive comes from your feet being planted firmly on the ground, a slight bend in the knees, and a full hinge at the hips.
The hinge allows the weight to pull your arms back between your legs, and locking out your knees while pushing your hips forward brings the kettlebell back up. It should feel like a catapult, and the catapult is encouraged almost entirely by your lower body.
Remember this: your swing is not a squat. As much as the drive comes from your lower body, it’s important to keep your hips ABOVE your knees.
Oh, and let’s not forget the core. If you do enough swings, your abs will be burning the next day! It’s important for you to keep your shoulders back (so the weight doesn’t drag your arms down) and stabilising your back means stabilising your core.
Try this: Set a timer and do as many swings as possible. Try for ten minutes. Find your rhythm and go with it. You can do 10 swings at a time, take a 30 second rest, and start again.
Turkish get-ups with kettlebells
Having trouble mastering the pull-up? Here’s the exercise you’re probably not doing yet to make it happen. Women in particular have a lot of trouble harnessing upper body strength, and it’s only natural, but that doesn’t make it impossible.
The Turkish get-up isn’t exactly an intuitive movement like the kettlebell swing. In fact, it’s rather awkward. Beginning in fetal position, you’ll curl up next to your bell and grab it.
Then, you’ll slowly stretch out, moving the kettlebell into the air as you eventually come from the floor to an upright position. Finally, you have to reverse the movement.
The hardest part? Coordinating opposite movements between arms and legs. Once you get that down, you can begin to appreciate the slow and steady burn that you’ll get performing Turkish get-ups for reps.
The Turkish get-up might seem goofy when you first watch someone do it or do it yourself, but it works every muscle in your body. This is hardly an exaggeration.
If you do enough of these, you will see the gains you’re after, and your other exercises WILL improve. Upper body strength? On its way. Promise.
Try this: Start with a light weight. Seriously, don’t try to push it! Do 5 get-ups on one side and 5 get-ups on the other side to warm up for a high-intensity kettlebell workout.
Kettlebell snatches
This has potential to be the most loved or the most hated lift. If you can get it down pat, snatch for reps and get into the literal “swing” of things, you will feel so powerful doing a routine with kettlebell snatches.
Of all kettlebell movements, it’s probably the most demanding in terms of cardiovascular endurance and strength. Cardio and strength? It means you can skip the treadmill. A snatch circuit might be the answer to the call for a short and sweet workout that works.
The snatch requires mobility in the shoulders, the same hinge in the hips you want in your kettlebell swing, and the strength to keep the bell above your head because you do NOT want to drop a kettlebell on your noggin. With this in mind, don’t up your weight too quickly. Work with a bell you can snatch for reps.
Technique should not be sacrificed, and it could take awhile to get down. The tough part? When you’re coming up, it’s helpful to envision elbowing someone standing behind you.
Your arm shouldn’t come from the hiking position to a full lock-out above your head. Remember, this is a full body thing, not an arm workout! While this move definitely uses a bit more genuine upper body strength than the kettlebell swing does, most of the power is driven from the legs and hips.
A tight grip in addition to a momentous hike back will “float” the bell above your head.
Try this: Set a timer for 3 minutes and do as many snatches as possible. It doesn’t sound like a long time, but it will feel like a long time. Try doing 5-10 on one side before switching to the other side.
Goblet squats with kettlebells
Squats are the holy grail of bodyweight movement and barbell movement, but the goblet squat is often left in the dust. There’s no good reason for this, either. Many people’s squats suffer, whether it’s knees caving in or super tight hips.
Some people just can’t hit depth while others struggle with keeping a straight back. Oh, and then there’s dreaded “buttwink.” Moral of the story? Squat form is important, and it’s worth taking some time to perfect.
The goblet squat offers up some serious benefit that can increase hip mobility and help you take on more weight with your barbell squat without sacrificing form. The weight being in your centre, rather than on your back or above your head, will balance you as it weighs you down naturally.
This helps your body to intuitively sit back into your squat rather than lean out of it or move from side to side. At the bottom, you will get some nice momentum as you pop back up.
Moreover, the weight will keep you grounded. When aiming to hit depth – when the backs of your thighs touch the backs of your calves – we often find our heels pulling up off the ground or our shoulders slouching forward. If you’re working with a heavy load, you WILL lose your balance and you’ll risk injury. That’s a big no-no!
The goblet squat is easily one of the most functional exercises you can add into your routine, whether to stretch and warm up or to work for reps.
Finally, squats have this reputation where it’s ALL about the booty. Contrary to popular belief, a proper squat will work so much more than that; hamstrings, quads, and abs come into the mix because proper squat execution means your entire body is tight and tensed, forcing every muscle to do its part.
Try this: Warm up with squats, focusing on depth, at the heaviest weight you can go, or whatever weight kettlebell you have. Do 5-10 for a great dynamic stretch that will provide your hips and knees with the TLC they need to work.
The military press
Now, it’s time to get buff. Ladies (and gentlemen), lifting weight above your head is hard work. Therefore, lifting weight above your head is a pretty clear indicator that you’re going to get an awesome workout. With that said, you cannot ignore the military press. Bonus? You’ll also have to ‘clean’ the kettlebell. Watch the video!
This lift works the shoulders, muscles in your back and the arms. Once again, the abs come into play with this lift, too. You can do all the sit-ups you want (you probably don’t want to), but nothing works the core and keeps it strong quite like lifting weights.
You can strict press the kettlebell which is the military press, and this mostly means you won’t be using any power in your legs. If you want to go heavier, you can do a push press which means you’ll draw a bit of power from a slight bend in the knees, lifting the weight as you lock the knees out.
If you want to get really strong, go for the double press. Because twice the kettlebell means twice the fun.
Drive power from your feet, keep your back as straight as possible (don’t let the weight sway you to the side), and keep your stance narrow which helps you keep tense. Tension is a defining factor in the success of every lift.
Try this: Kettlebell presses can be done as you like, but it’s helpful to work them for heavier weight. Set a number goal you’d like to reach and go for it at a manageable number. Test your one-rep max as it will improve over time.
Do you work out with kettlebells? What’s your favourite lift and why? Tell us in the comments below.
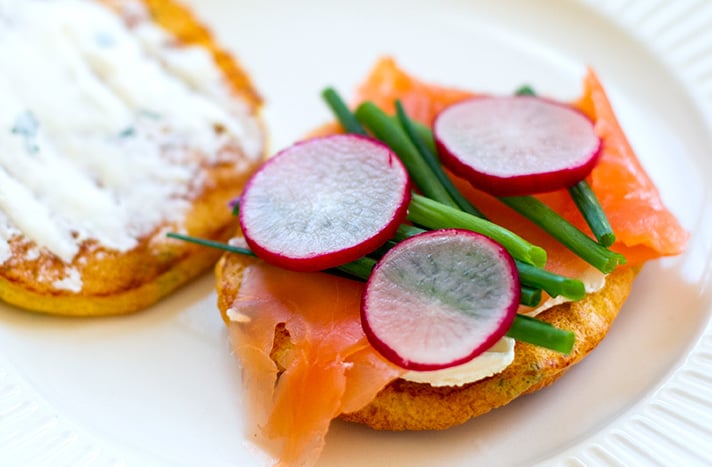
Living up to its name, cloud bread is super light and fluffy. I have no idea who came up with the original recipe, or how the name came to be, but it has become the ‘must-try’ food in the low-carb and wellness circles.
In today’s post, I’ll show you how to make delicious savory cloud breads with chives and pepper. P.S. This is cloud bread without cream of tartar.
What’s really good about these little pancake-like clouds of goodness is they are a perfect substitute to bread-y foods like sandwich slices or burger buns.
Cloud bread is very low in carbohydrates while being high in protein and healthy fats. You can eat it as is, with a lovely crisp salad, or top it with your favorite ingredients such as smoked salmon and cucumber or good quality ham.
Cloud bread variations
The basic recipe for cloud bread calls for only three ingredients – eggs, cream cheese and cream of tartar (or anything acidic basically – I used some apple cider vinegar to stabilize the egg whites).
You can then add your favorite additions such as chopped fresh herbs or a little honey for a sweet version. I used chives and pepper in my version.
If you can’t tolerate dairy, you might be able to use cashew based cream cheese alternative. I haven’t tried it, but I would be curious to see how that turns out.
If anyone wants to make a small batch, do let us know if it worked. Apparently cottage cheese or ricotta will also work.
Shop for key ingredients on Amazon: free-range, grass-fed non GMO chicken eggs, apple cider vinegar, cream cheese, baking paper, coconut oil.
Preheat the oven to 150 C/ 300 F (conventional). Lightly grease a large piece of parchment baking paper with coconut oil or olive oil and layer over a flat baking tray. You might need to use two trays depending on the size. Set aside.
Carefully separate the eggs, making sure there are not yolks in the whites. Add the egg whites to a large glass or stainless steel bowl and the egg yolks to another smaller bowl.
Add the cream cheese, chives, pepper and salt to the yolks and set aside.
Add a teaspoon of apple cider vinegar to the eggs whites. You can also add a tiny pinch of salt. Beat the whites with an electric whisk on high speed until stiff peaks. You should be able to turn the bowl over with the egg whites moving. Set aside.
Using the same whisk, no need to wash, mix together the yolk mixture until smooth and creamy.
Fold the egg yolk mixture into the egg whites gradually. Be gentle and try not to over mix as this will break down the air bubbles in the whites.
Using a large spoon or a quarter cup, scoop the mixture into even rounds on the sheet, think a small pancake or a cookie, however you can also make them burger bun diameter. The will flatten and spread slightly so allow for some room between the breads.
Bake on the middle rack for about 20-25 minutes. This will vary if you’re baking on two trays and need to rotate those half way for even cooking. In some cases, these will be ready in 25-30 minutes. Keep an eye on them at the 20-minute mark.
Remove from the oven and cool slightly before peeling them off the baking sheets. You can slide a knife or a spatula under each cake to get it off.
While still warm, they will resemble a cooked meringue, but slightly denser but this texture will change as they cool down completely. Once refrigerated for a few hours or overnight, they will become more bread like. You can store them in a zip lock bag or an air-tight container for 2-3 days.
3.5.3226
Want more recipes like this?
Is life getting in the way of your goals to eat healthier and feel better?
We know it’s hard to stay on track when you’re tired and busy during the week. We often make bad choices when unplanned and unprepared.
That’s why we created our make ahead meal plans, complete with real food recipes and shopping lists that will cover you for five dinners, lunches and breakfasts.
We believe that planning and preparing meals ahead of time is your best strategy towards healthier eating. Get the 7 Day Meal Plan Today.
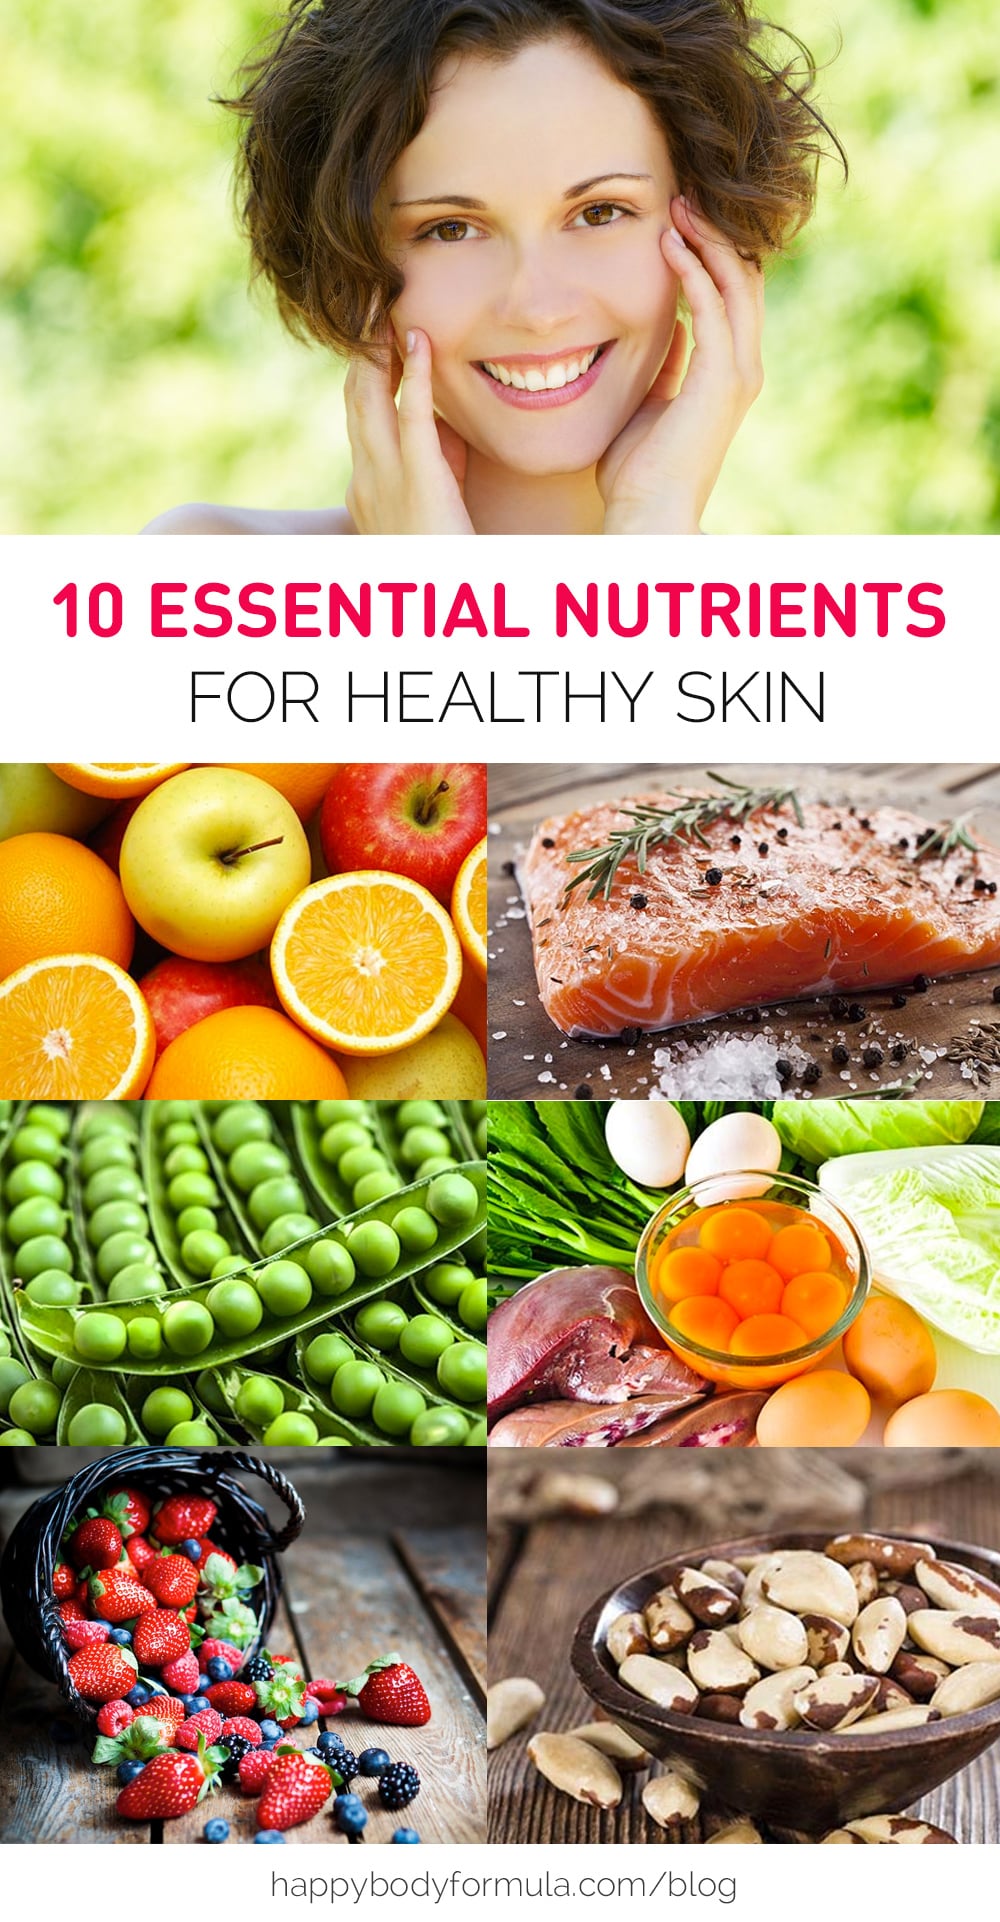
Everybody wants soft, glowing, smooth and unblemished skin. From growing out of teenage breakouts to fighting off oily versus dry to covering up with makeup to trying our best to age gracefully (wrinkles are natural, folks), we go through a lot of phases with our skin.
The skin is in fact the body’s largest organ, and it only makes sense that we treat it with care. Naturally, we can find a way to make an impact with the foods we eat.
We’re going to suggest that you forgo the facelift or the commercial acne products and instead, get on board with these ten nutrients that will nourish your skin every single day.
Silica
Let’s start off with one of the lesser known nutrients that could improve your skin a LOT. When we’re young, our bodies have plenty of this stuff to work with.
As we age, it is often replaced in our bodies with calcium. Collagen – the connective tissue in our skin – relies heavily on silica as it’s one of its main components. When we have enough silica, it increases collagen production which can help reduce wrinkles.
Supplementing with silica has also been proven to decrease acne because it lessens inflammation of our skin cells.
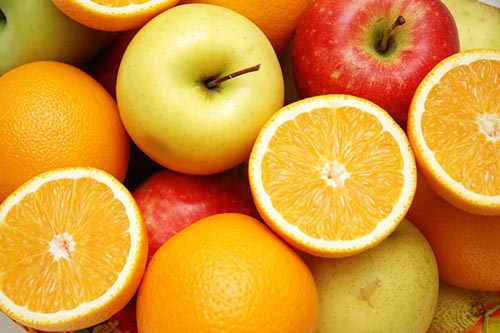
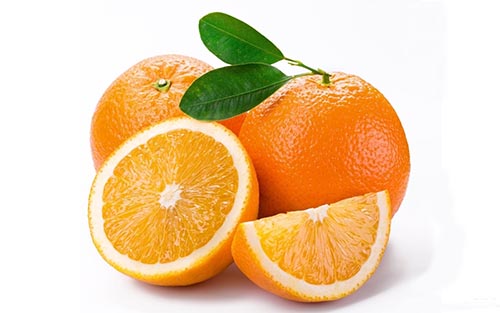
Where to get it: Food sources include apples, oranges, fish, oatmeal and seeds. You can also supplement with bamboo extract which contains around 70% silica.
Omega-3 fatty acids
What aren’t omega-3 fatty acids good for? We stress the importance of packing in the omega-3’s for optimal health all the time, especially in the Happy Body Formula meal plan, and glowing skin is no exception.
These fatty acids can be especially beneficial to people who suffer from chronically inflamed skin such as those with eczema. They help the skin to easily repair itself, manage cortisol levels which in turn prevents wrinkles, and helps keep the skin moist.
Where to get it: Omega-3 fatty acids don’t naturally occur in the body, so eating oily fish like salmon or sardines is the best source of the stuff. Plant sources include flaxseed and hemp seeds. Alternatively, you can supplement with fish oil pills.
Zinc
This trace mineral is kind of a big deal when it comes to healthy skin. Besides just wrinkles and acne, our skin is often exposed and wounded, and this is where zinc comes in.
It helps to repair the damaged tissue effectively. Zinc oxide is also a good natural sunblock as it helps to protect the skin from harmful UV rays, warding off both sunburn and the threat of skin cancer. Lastly, zinc is an amazing acne-fighting nutrient because it helps to regulate the skin’s natural oils.
Where to get it: Oysters, pecans and mushrooms are great real food sources of zinc. You can supplement with zinc oxide cream using it as a natural sunblock or even a dandruff treatment.
Vitamin A
Dry or flaky skin a problem? Moisturizer comes in all shapes and sizes, but oftentimes, it doesn’t do much for the problem at hand. A more long term solution? A bit of vitamin A goes a long way.
Vitamin A pairs with beta-carotene (a precursor, so it helps to produce it in the body) to provide skin repair by reducing damage from free radicals, for example, overexposure to the sun.
Overall, this vitamin makes your skin stronger giving a new meaning to “thick skin,” so getting plenty of it will help you stay protected against infection.
Where to get it: Beta-carotene helps the body to produce vitamin A, so make sure you’re eating vibrant veggies like collards, asparagus and sweet potatoes. If you’re a fan of offal, liver packs in loads of vitamin A.
Vitamin B3
This B vitamin – otherwise known as Niacin – is one of the most potent in giving your skin the VIP treatment it deserves. One study claims the stuff can prevent skin cancer!
It’s also quite an effective acne treatment. People who suffer from rosacea or chronic redness of the skin can benefit from supplementing with vitamin B3. Finally, regular niacin intake can help ward off signs of aging (no Botox required) and increases moisture in skin.
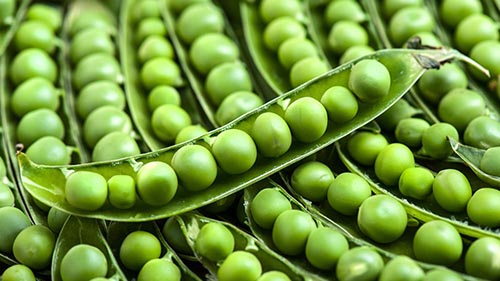
Where to get it: You can supplement with Niacin tablets or you can opt for real food. Some good sources include lamb’s liver, tuna and green peas.
Vitamin C
This miracle vitamin is the holy grail of skin food. It can do just about anything it puts its mind to. Vitamin C can reduce brown spots caused by the sun, boost healthy collagen production for smooth skin, and improve the skin’s healing process leading to a quicker rebound from breakouts and acne.
Moreover, vitamin C can actually increase effectiveness of sunscreen! Next time you’re packing a picnic for the beach, don’t forget your citrus.
Where to get it: Not just oranges! You can make a vitamin C serum with powder at home to supplement with easily and on-the-go. When planning out vitamin C heavy meals, choose foods like bell peppers, fruits like guava and kiwi, and plenty of leafy greens.
Vitamin E
This vitamin isn’t just a vitamin, it’s also a powerful antioxidant. With antioxidants come good things! This is a classic ingredient for skincare products, and it’s been used for a long time.
It helps to neutralize free radicals and lessen their damage on skin. You can mix up some vitamin E with olive oil for an effective treatment for rough skin, or you can use it to reduce brown spots as application promotes healthy cell regeneration.
Where to get it: You can often find it in the vitamins and supplements aisle in capsules with liquid inside. Though it’s good for skin, it can be harmful, so it’s best to use vitamin E in conjunction with other antioxidants (products that also include vitamin C and/or CoEnzyme Q10). Avocado, almonds and hazelnuts provide solid food sources of this vitamin.
Selenium
This essential mineral – also an antioxidant – is one in which a little goes a long way. We don’t need much, but the small amount we do get makes a big impact, especially on our skin.
It protects cells from damage like most nutrients on our list, making it a suitable contender for those of you who like to soak up the sun.
Since the immune system relies pretty heavily on selenium, it’s one of the most vital nutrients in fighting skin infection. Finally, this nutrient is anti-inflammatory which helps the skin to age more gracefully.
Where to get it: You don’t need to overdo it with selenium. A single Brazil nut provides TWICE your daily intake! Otherwise, just make sure that you’re getting plenty of seafood and beef which are generally sufficient sources of the stuff.
Vitamin B5
Another B vitamin makes our list, and this time, we’re talking Pantothenic acid (B5’s fancy nickname). It supports proper healing of wounds especially when used as a topical treatment. It also increases levels of glutathione which act as a powerful antioxidant.
This means your skin cells are better protected from sun, pollution and any other physical stressors because the cell membranes are in good shape.
Where to get it: Once again, liver ends up in our “foods for your skin” list as it’s quite a potent source of vitamin B5. Not a fan? Fish, shellfish, and chicken will do. Chronic stress and pregnancy can put you at risk for deficiency, but otherwise, you ought to be getting enough through diet.
Bonus: collagen!
This technically is NOT a nutrient, but it IS something you can easily supplement with. Like eating liver is good for your liver, collagen consumption is good for the collagen in your skin which is largely what it’s made up of.
Makes sense, right? This protein, produced by our skin, literally helps hold it together. Therefore, it’s one of the best remedies for wrinkles and overall suppleness in our skin. Our skin produces less collagen as we age, so supplementation via diet is very important.
Where to get it: Plenty of foods contain collagen-producing ingredients like leafy greens, avocado oil, rosehips (which make a lovely tea) and even chocolate.
A pretty tasty lineup, eh? Gelatin-rich foods like homemade bone broth, gelatin gummies, or a grass-fed collagen hydrolysate powder are easy ways to add a collagen boost as well.
What’s your secret to healthy, vibrant skin? Share it with us below and share this list with your friends!


 [/fusion_builder_column]
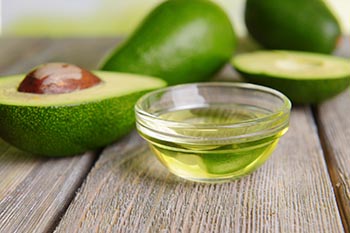


 For similar recipes, check out